
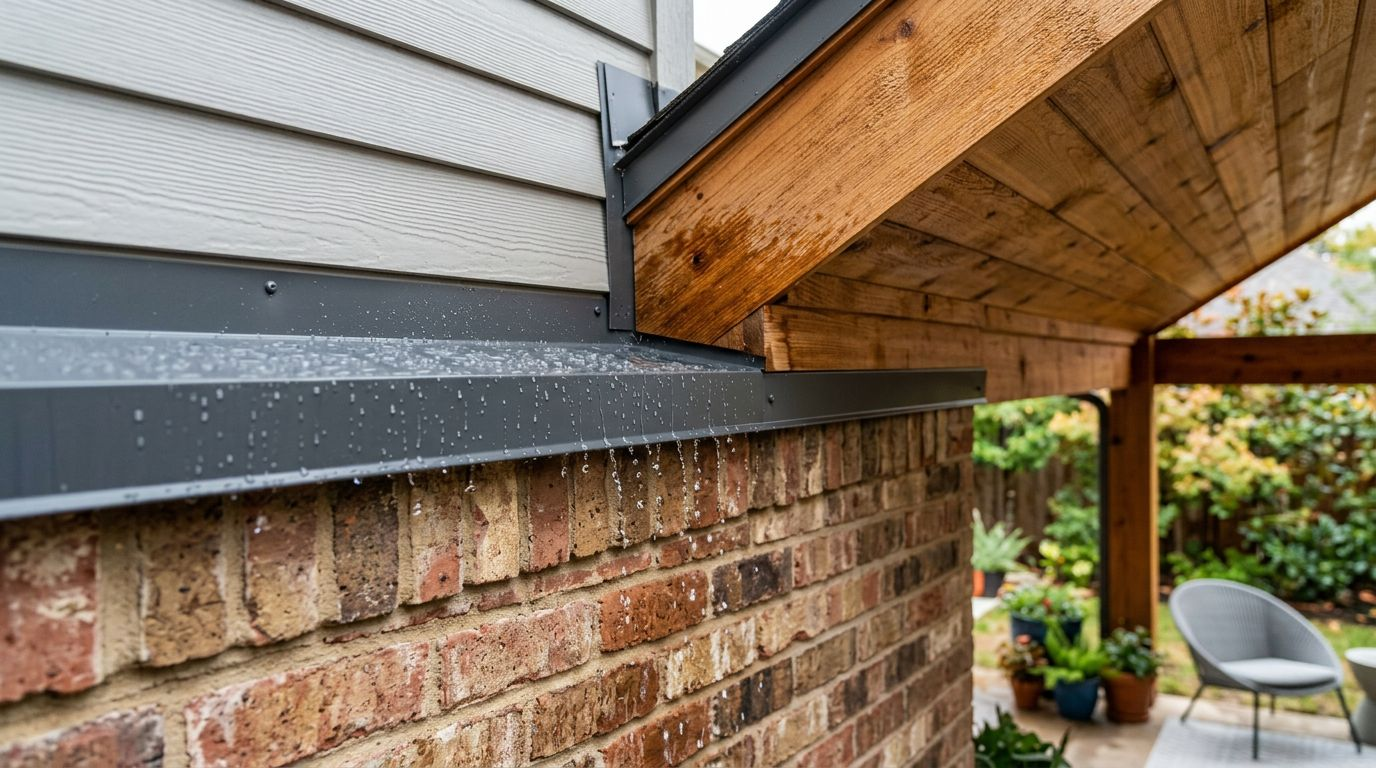
If your patio cover attaches to the house, water will try to sneak in where the roof meets the wall. That joint is a lot like the collar on a rain jacket. If it gaps or folds the wrong way, you get wet.
Done right, patio cover flashing directs water out and down, before it reaches framing. Done wrong, it can trap water behind brick or under siding, where damage grows quietly for months. This guide breaks down what changes between brick veneer and siding walls, so you can spot good work and avoid the usual leak traps in North Texas cities like Denton, Argyle, Flower Mound, and nearby communities.
Why patio cover flashing fails (and why wall type changes everything)
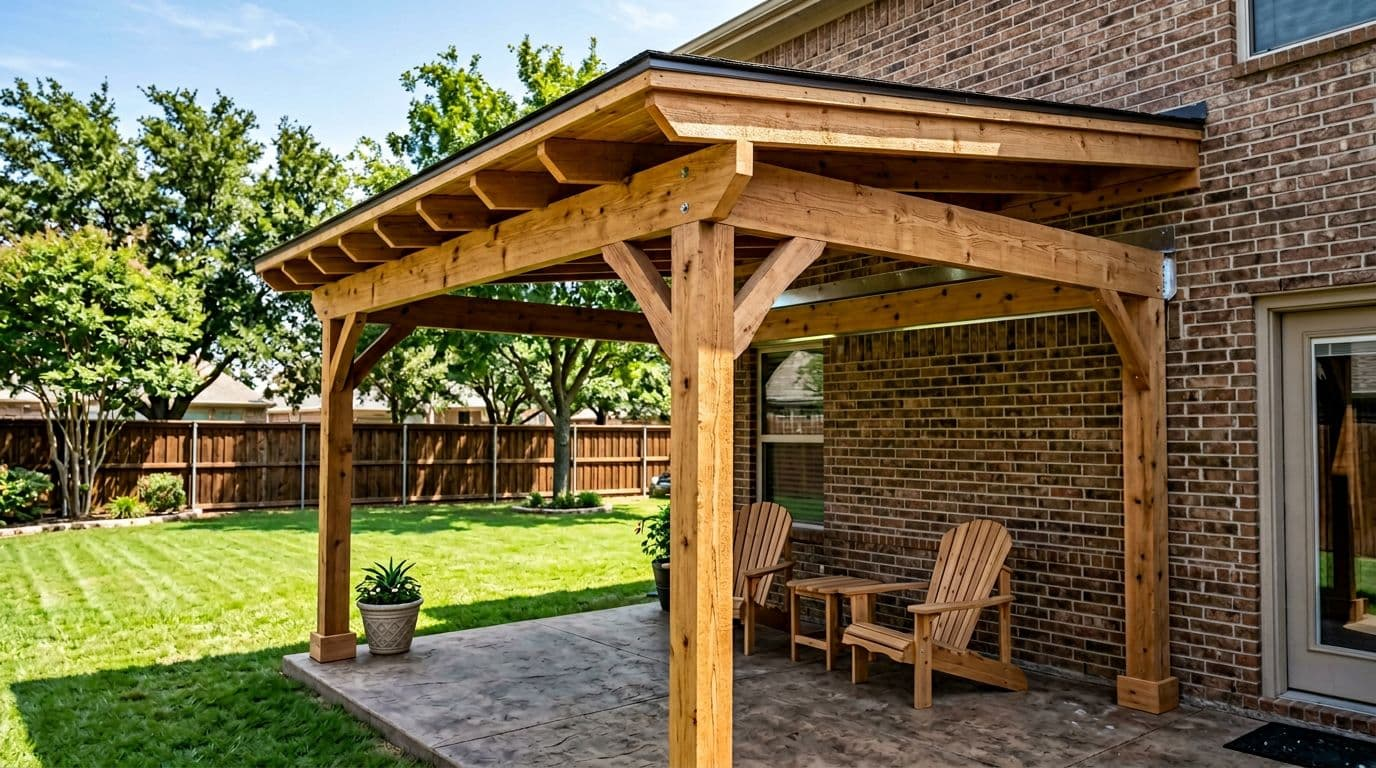
An attached cedar patio cover with visible metal flashing at the wall connection, created with AI.
Flashing fails for one main reason: water does not follow your plans. It follows gravity, wind, and surface tension. As a result, even a small reverse lap can pull water behind the wall layer.
Your wall type matters because the “drainage plane” changes:
- Brick veneer walls are built to manage water that gets behind the brick. They rely on an air gap and weep holes to drain.
- Siding walls depend on a weather-resistive barrier (WRB) and correct shingle-style lapping to shed water.
Texas weather adds pressure. Hard rain blows sideways, then sun bakes the joint dry, then the next storm hits again. That cycle opens small cracks in sealant and stresses fasteners. If flashing depends on caulk alone, it will fail.
One more point: patio covers are structural. The ledger connection and the waterproofing details have to work together. If your cover is older, sagging, or already leaking at the wall, it may be smarter to address the full assembly. In that case, start by reviewing patio cover replacement Denton TX so you can compare repair limits versus a rebuild that fixes the attachment and flashing together.
Patio cover flashing for brick veneer walls (water has to drain, not get trapped)
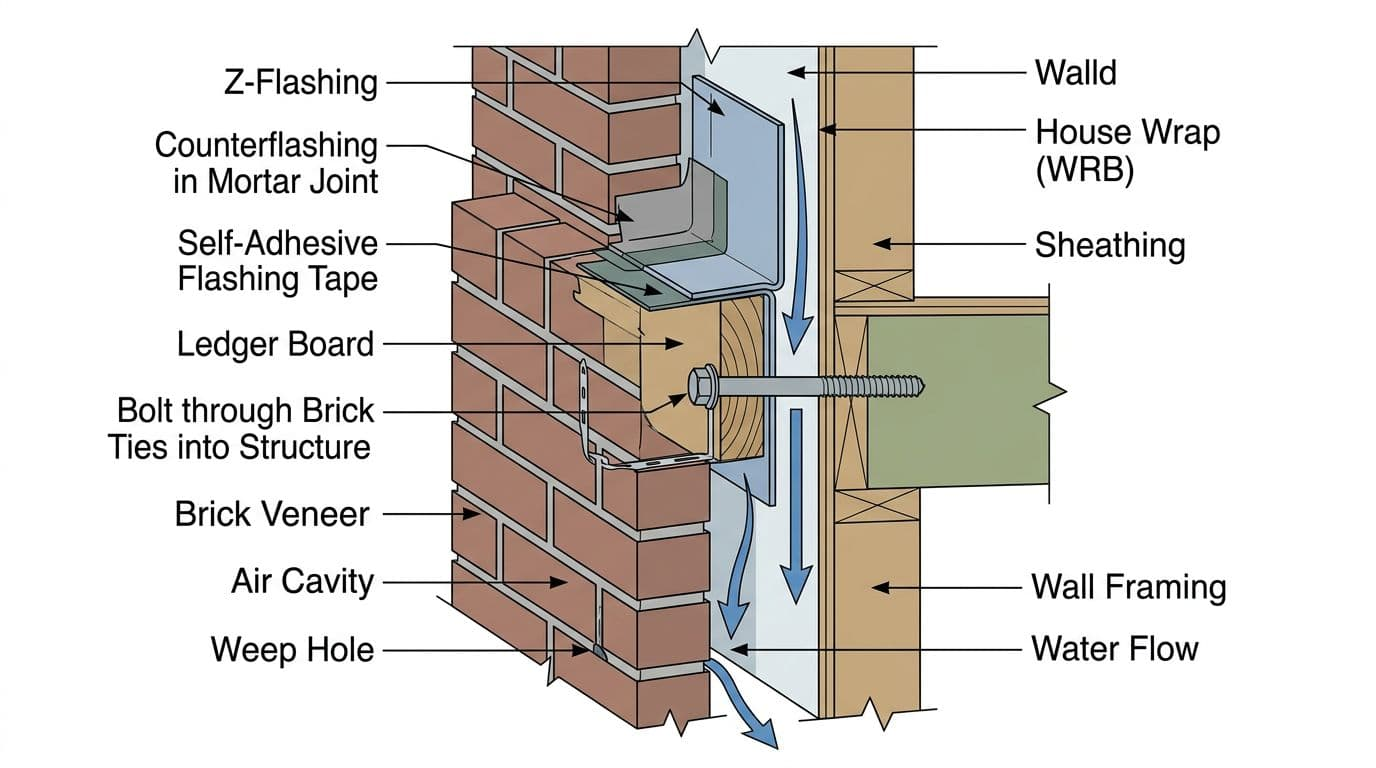
Brick-veneer ledger and counterflashing layout, created with AI.
Brick veneer is not a waterproof wall. It is a rain screen. Water can pass through mortar joints, then drain down the back side of the brick. That is why weep holes exist. Your patio cover flashing has to respect that drainage path.
A reliable brick-wall approach usually includes these layers (from wall to cover):
First, you confirm the ledger is structurally attached to framing, not just to brick. Brick is a veneer, so it can’t take ledger loads by itself. Next, you integrate self-adhesive flashing tape behind the ledger area, tying into the WRB where possible.
Then you add metal Z-flashing (drip cap) over the top of the ledger, sloped to shed water away from the wall. The most important protection on brick is the next step: counterflashing that tucks into the mortar joint (often set in a reglet cut), then laps over the Z-flashing. That overlap is what keeps wind-driven water from going behind the metal.
If you block weep holes or seal the brick tight to the flashing, you can trap water behind the veneer and force it inward.
Because brick details can vary, it helps to see a basic explanation of how flashing is commonly installed at brick intersections. This overview on installing flashing against a brick wall shows the general idea of cutting into mortar joints for counterflashing (the same concept applies at many patio cover to brick transitions).
Patio cover flashing for siding walls (lap it like shingles, leave room to breathe)
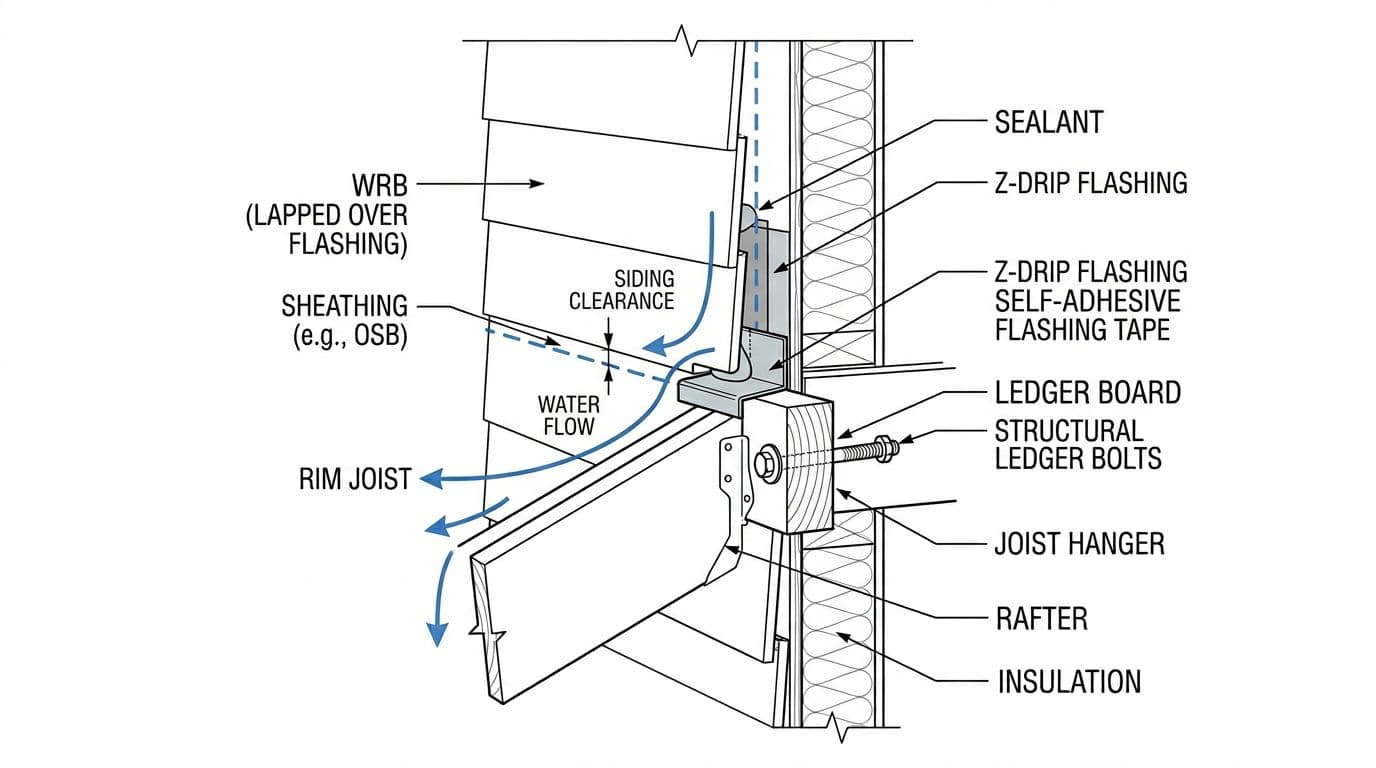
Siding-wall ledger flashing with WRB laps and clearance, created with AI.
With siding, your goal is to tie the patio cover into the wall’s water-shedding layers, without making a “bathtub” behind the ledger. Think of it like overlapping roof shingles. Each upper layer must lap over the layer below.
In many cases, the cleanest method starts with carefully removing or cutting back siding where the ledger mounts, then locating framing for proper bolts or lags. After that, you integrate flashing with the WRB:
- Self-adhesive flashing tape goes behind and around the ledger area, but it has to lap correctly with the WRB so water always exits outward.
- Z-flashing/drip cap covers the ledger top edge and kicks water out.
- A termination bar or properly detailed top edge helps lock the upper membrane edge in place, depending on the system.
- Siding clearance above flashing matters, especially for fiber cement and wood, because it reduces wicking and lets the joint dry after rain.
Sealant has a role, but it should act like a gasket, not a dam. In other words, you use it to close small, controlled joints, not to “glue” the whole assembly watertight.
If you want a practical refresher on how self-adhered membranes and step-by-step lapping work (even though it’s focused on doors), Polyguard’s guide to patio door flashing steps explains the same water-management principle you want at a ledger: tie into the WRB, lap top over bottom, and keep drainage moving out.
Common patio cover flashing mistakes that lead to leaks
Most leak problems come from a few repeat issues, especially on older builds:
Reverse laps: Metal or tape tucked the wrong way, so water runs behind it.
Over-caulking: Heavy sealant that traps moisture and fails in heat cycles.
No kick-out at edges: Water dumps behind trim or into siding corners.
Fastener penetrations left bare: Bolts and lags need compatible sealing, not just hope.
Brick drainage blocked: Weeps clogged by mortar, foam, or sealant.
A good flashing job sheds water even after the caulk ages. If it only works when sealant is perfect, it’s not a durable detail.
When you’re comparing real-world approaches, it also helps to read how experienced builders think through these wall transitions. This discussion on flashing a patio cover to an existing wall highlights why “just silicone it” is rarely the right plan.
Patio cover flashing Q&A (quick answers you can use on-site)
Do you need patio cover flashing on an attached cover?
Yes. Any roof-to-wall connection needs a water-shedding path. See our roof-to-wall flashing guide for step flashing, counterflashing, and kick-out diverter details. Without flashing, you’re relying on siding, brick, or caulk to stop water, and that usually fails.
Can you attach a ledger to brick veneer?
You can’t rely on brick veneer alone for structural support. The ledger should connect to framing, with a brick detail that still allows the veneer to drain.
What’s the right order: flashing tape or metal flashing?
In most assemblies, you integrate the membrane layer first, then install metal Z-flashing over the top edge so it sheds water outward. The exact order depends on the wall system, so match the method to the WRB and manufacturer guidance.
Should siding touch the flashing?
No. You usually want a small clearance so the siding doesn’t wick water and so the joint can dry. The needed gap varies by siding type.
Is caulk enough to stop leaks at the wall?
Caulk helps, but it’s not the main waterproofing. Over time it shrinks and cracks, especially under Texas sun.
Conclusion: build the joint so water has an easy exit
Patio cover flashing works when you treat it like a one-way chute for water, not a sealed container. Brick needs drainage respected, while siding needs clean WRB laps and clearance. If you want help diagnosing a leak or planning an attached cover that fits your roofline, call 469-340-0839 and get straightforward guidance for your home. The goal is simple: keep water out, and keep your structure solid for years.