Cedar Patio Cover Builder in Denton, TX: Design, Costs, Permits & What to Expect
A cedar patio cover adds shade, comfort, and curb appeal—here’s how to choose the right design, plan the build, and get results that last in North Texas.
Planning a cedar patio cover in Denton? Most projects go smoothly when you decide a few things early—before drawings, footings, or lumber orders start.
- Shade goal: full shade (solid roof) or filtered shade (lattice/pergola)?
- Placement: attached to the home or a separate freestanding “outdoor room”?
- Future add-ons: fan(s), recessed lights, outlets, TV mount, heaters, gutters.
- Permit readiness: confirm setbacks/easements and whether electrical is included.
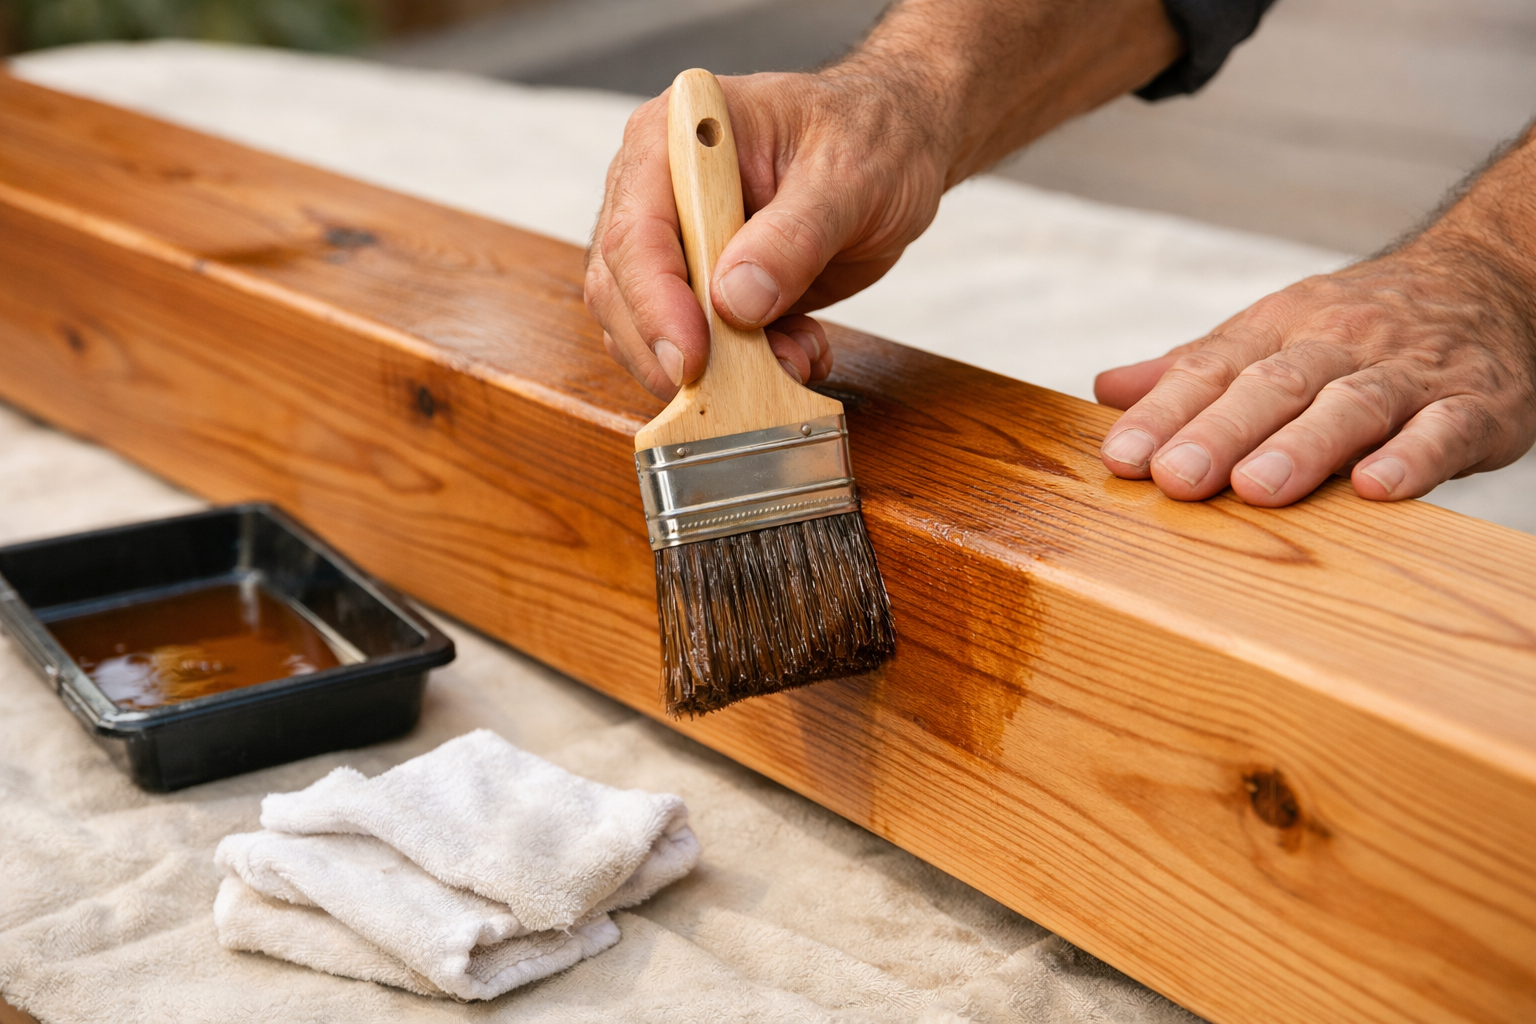
- Finish plan: stain/sealer strategy so cedar stays warm-toned instead of weathering gray.
If you’ve been searching “cedar patio cover builder Denton TX,” you’re probably trying to solve a practical problem—heat, glare, sudden rain, or a patio that feels underused. Cedar is one of the best-looking ways to fix that, but it’s also a structural project. The difference between “nice on day one” and “still solid after Texas storms” comes down to design details, load paths, and how the cover is tied into your home or footings.
This guide breaks down the most important decisions: which cedar style fits your yard, what typically affects cost, how Denton permits and code considerations usually enter the picture, and how to maintain the finish so it keeps its curb appeal year after year.
Why Cedar Works So Well for Denton Backyards
Denton’s weather pattern is the real test: hot sun, sudden downpours, humidity swings, and storm-season wind. A patio cover has to handle all of it while still looking like it belongs on your home. Cedar earns its popularity here because it balances beauty and practical performance.
- Naturally resistant to rot and insects: Cedar’s natural oils help it hold up in North Texas conditions where moisture and heat can accelerate deterioration in less durable woods.
- High-end visual warmth: The grain and tone make a cover look “built-in” instead of like an afterthought—especially when paired with matching stain and trim.
- Workable for custom joinery: Cedar is friendly for detailed cuts (decorative tails, corbels/braces) and clean connections that elevate the finished look.
- Better color control with proper finish: With a quality stain/sealer that includes UV protection, cedar can keep its rich tone longer and weather more evenly.
- Maintainable long-term: Periodic cleaning plus a predictable recoat schedule beats constant patching and replacing.
Reality check: Cedar is durable, but it’s not “set it and forget it.” The finish you choose—and how often you refresh it—largely determines whether it stays honey-toned or fades toward a silvery gray.
If you want to see how cedar can feel integrated (not tacked on), it helps to look at nearby examples. The design principles are similar across the area—even if rooflines and lot layouts vary. For inspiration, compare projects like luxury cedar shade structures in Flower Mound and cedar patio covers in Lewisville that match your home.
Key takeaway
Cedar is a strong choice for Denton because it blends natural resistance with premium aesthetics—but the “wow factor” lasts longer when you plan the finish and drainage from day one.
Popular Cedar Patio Cover Styles (and How to Pick One)
Most homeowner frustration comes from choosing a style based on photos, then realizing the real-world experience is different. In Denton, the best style is the one that matches your sun exposure, how you actually use the patio, and how much weather protection you want.
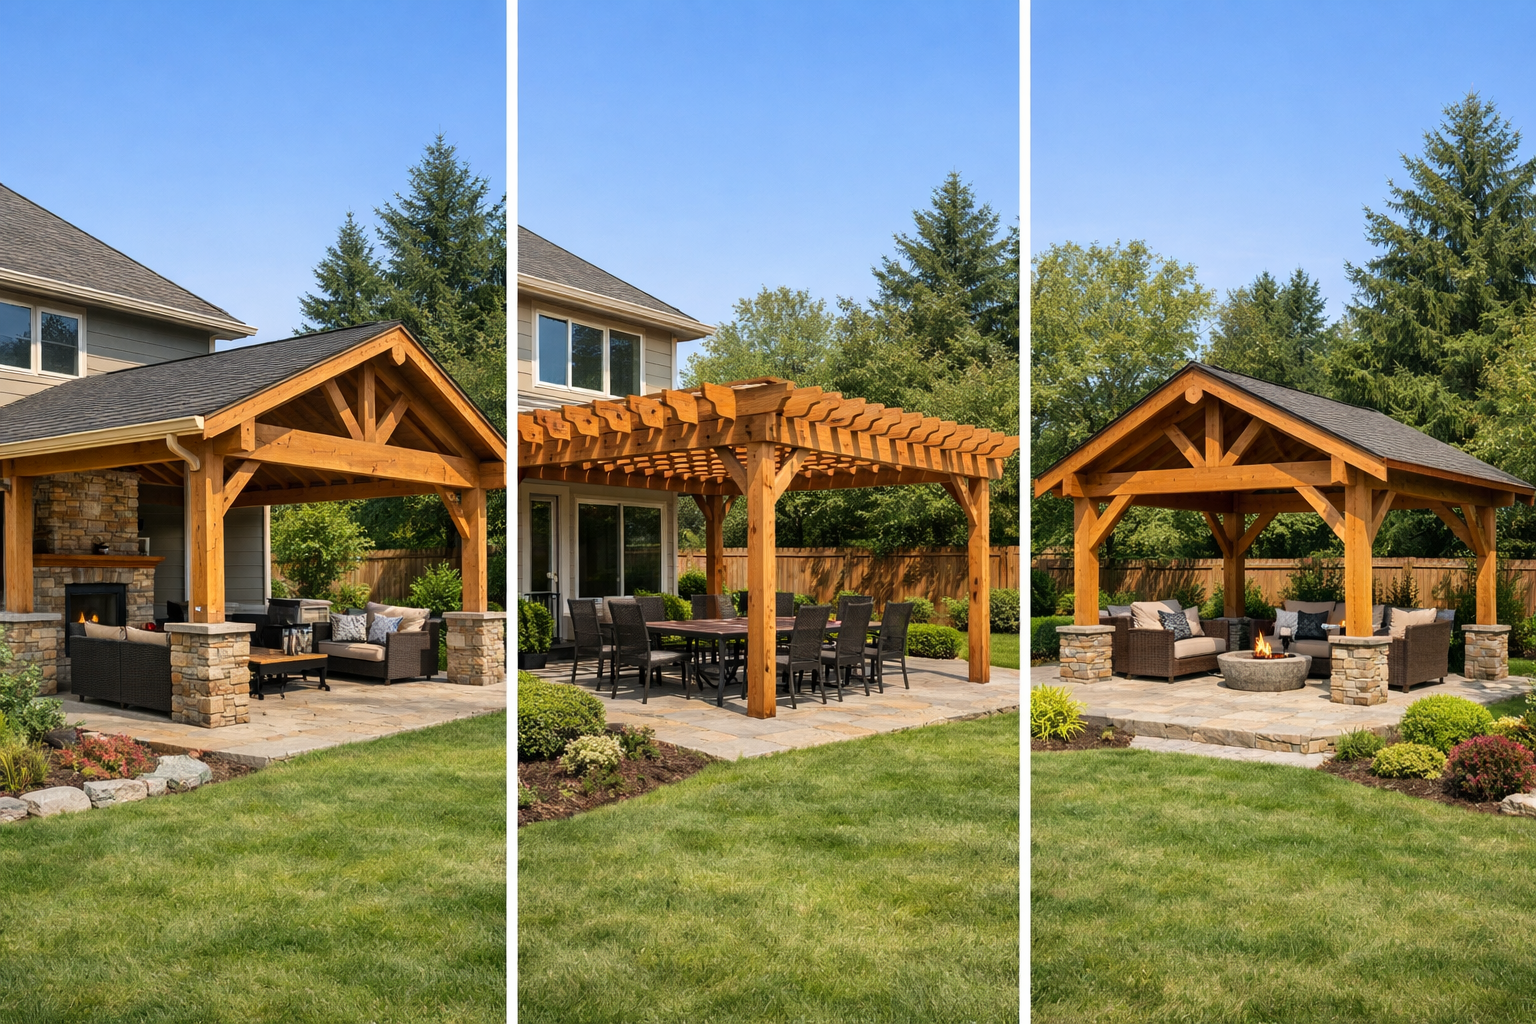
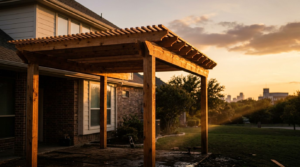
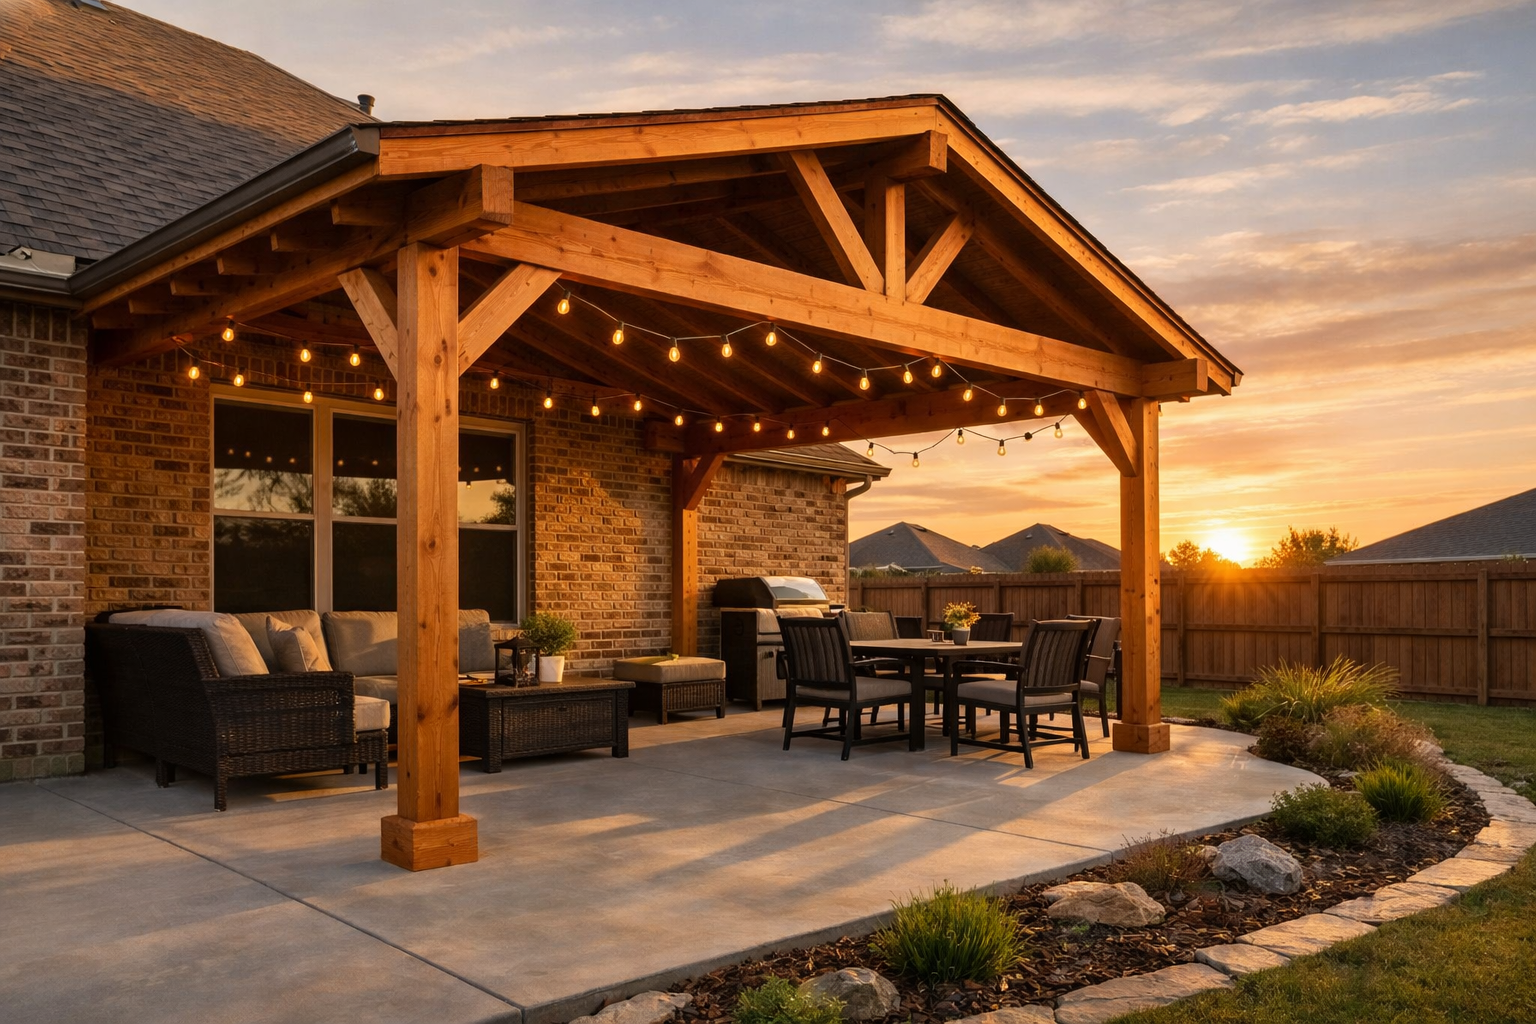
1) Solid roof cedar patio covers (maximum comfort)
A solid roof is the closest thing to turning your patio into an outdoor room. If you want consistent shade, protection from rain, and the ability to mount lights and fans comfortably, this is usually the best fit. In peak summer, a solid cover can make the difference between using the patio daily and avoiding it entirely.
- Best for: outdoor dining, outdoor kitchens, seating zones with TVs, families who use the patio year-round
- Consider: roof tie-in details, slope/drainage, and flashing (especially on brick/siding transitions)
If your cover will attach to the house, understanding water management is essential. This companion resource is worth reviewing: Patio cover flashing guide for brick and siding walls.
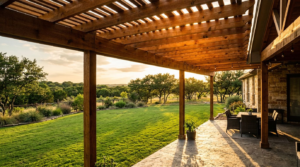
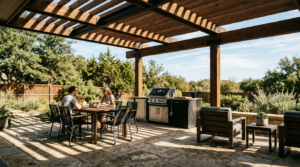
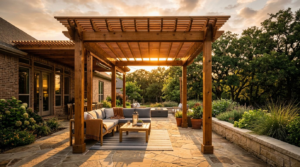
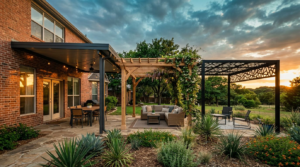
2) Lattice/pergola-style cedar covers (filtered shade + open feel)
Pergolas and lattice covers are popular when you want a breezier look and don’t mind sun “movement” throughout the day. The shade is filtered, not fully blocked, which can be ideal for morning light or if you want to keep the backyard from feeling closed in.
- Best for: aesthetic upgrades, partial shade, climbing plants, lighter visual footprint
- Consider: how harsh the afternoon sun is on your specific patio orientation
If you’re debating formats, compare the comfort level of a pergola-style cover to other enclosure options. This explainer can help: Cedar patio cover vs screened porch for North Texas backyards.
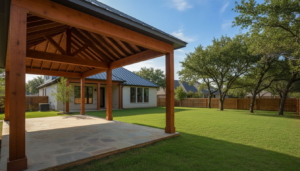
3) Freestanding cedar covers (define a separate zone)
A freestanding pavilion can create a “destination” in the yard—poolside seating, a firepit area, or a grilling pavilion away from the back door. It’s also useful if tying into the home’s roofline is complicated or if you want to avoid disturbing existing fascia/roof details.
- Best for: larger backyards, pool areas, secondary seating zones
- Consider: setbacks, easements, and footings (plus electrical trenching if you want outlets/lighting)
How to decide quickly (a practical checklist)
- Map your sun: note when the patio is unusable (e.g., 4–7 pm glare). If that window is the main problem, you likely want a solid roof.
- Choose your “light level”: if you love daylight and only need relief, a lattice/pergola might be perfect.
- Confirm where posts can go: door swings, traffic paths, grill clearance, and furniture layout should determine post locations—not the other way around.
- Plan utilities now: if you want fans/lights later, pre-plan structure and wiring routes so you don’t end up with exposed conduit.
You can also compare “how it lives” across similar North Texas homes. This breakdown is helpful if you’re deciding between formats: Attached vs freestanding patio covers for North Texas homes.
Design Details That Make a Big Difference
Two patio covers can look similar in photos but feel completely different in person. The “feel” comes from structure (post/beam sizing, spacing, and connections), drainage planning, and whether the builder designs for Denton’s real-world wind and storm patterns.
Structure: post spacing, beam sizing, and connections
A sturdy cover behaves like a single system: loads transfer from roof to beams to posts to footings, without bounce or racking. Post spacing and beam sizing aren’t just cosmetic—overspans can lead to noticeable sag and vibration over time. If you want to geek out on spacing (and why it matters), this guide explains the tradeoffs clearly: Cedar patio cover post spacing: how far apart should your posts be?
Wind is another big deal in Texas. Ask your builder what wind assumptions they’re using and what hardware/anchors are specified. A well-built cover should inspire confidence during storm season, not anxiety. This resource helps you know what to request: Texas patio cover wind ratings: what your builder should show.
Drainage: slope, runoff direction, gutters
Solid roof covers need a plan for where water goes. Without proper slope and runoff direction, you can end up with splash-back near the foundation, wet edges that accelerate staining, or puddling on the patio surface. A good design considers:
- Roof pitch that drains efficiently without looking awkward against the home
- Gutters/downspouts when needed to control overflow
- Runoff direction away from door thresholds and high-traffic pathways
Electrical: plan it early for a clean look
Homeowners often decide on fans and lights after the cover is up. The result can be visible conduit, awkward fixture placement, or limited switching options. If you plan electrical early, your builder can hide routes inside beams/ceiling where possible and coordinate box placement for:
- Ceiling fan(s) centered over seating zones
- Recessed lights or surface-mounted fixtures with consistent spacing
- Weather-rated outlets for grills, speakers, string lights, or a laptop
- TV mount backing/support (and the right viewing angle)
Finish: stain color, UV protection, and recoat realism
Cedar can look dramatically different depending on finish choice. Semi-transparent stains show grain and feel classic; more opaque products hide variations but can be more uniform. The most important performance feature in Denton is UV resistance—direct sun is what accelerates fading and uneven weathering. Ask what product is being used and what a realistic recoat interval is based on your orientation (south/west exposure tends to need more attention).
Architectural touches: small details that make it match
Details matter: decorative braces, tapered columns, and end cuts can make a patio cover look like it was part of the original build. If your home has specific exterior cues (brick arches, craftsman trim, modern lines), echoing those shapes can turn “a cover” into “an extension.”
Key takeaway
If you want a patio cover that feels premium, prioritize structure and water management first. Decorative details are the finishing touch—not the foundation.
Costs, Timelines, and What Influences the Price
Cedar patio cover pricing in Denton varies because “patio cover” can mean anything from a simple pergola over a small slab to a large solid-roof structure with electrical, gutters, and upgraded detailing. The best way to think about cost is as a combination of size, complexity, and site conditions.
The biggest price drivers
- Footprint and height: larger and taller covers use more lumber, require larger beams, and can increase labor and hardware needs.
- Roof type: solid roofs typically cost more than lattice/pergola styles because of sheathing/roofing materials and flashing/drainage requirements.
- Spans and engineering: fewer posts with longer spans can look cleaner but may require heavier beams and upgraded connectors.
- Electrical and upgrades: fans, recessed lights, outlets, switches, and TV provisions add time and coordination.
- Finish quality: premium stain systems and careful prep can cost more but reduce blotchiness and extend recoat intervals.
Site conditions that can change the scope
A quote isn’t only about the structure; it’s also about how hard it is to install correctly. Expect possible adjustments based on:
- Patio slab condition: cracks, thin edges, or unknown thickness can affect anchoring choices
- Soil and footing needs: stable footings are non-negotiable for long-term performance
- Access: tight side yards and landscaping constraints can increase labor
- Existing roof/fascia: attachment points and flashing complexity vary by home
If you’re unsure whether your existing concrete can support a cover (especially if posts may land near edges), review: Patio slab support: how to tell if your slab can handle a cover.
Typical timeline: what to expect
Every builder’s process is different, but a realistic schedule usually includes:
- Discovery & design selection: goals, measurements, style choice, finish options
- Permitting (if required): submittals, revisions, and inspection scheduling
- Material procurement: cedar selection, hardware, roofing components, finish products
- Build phase: footings/posts, framing, roofing, finish, electrical (if included)
- Final walkthrough: cleanup, punch list, care guidance
Quote comparison tip: Ask for a written scope that specifies lumber grade, post/beam sizes, hardware/anchors, finish system, roofing materials (if solid), and cleanup. Comparing “apples to apples” can save you from surprise add-ons.
If you want a deeper, more numbers-oriented view, this is a strong companion read: How much does a custom cedar patio cover cost per square foot? It helps you sanity-check bids and understand why two estimates can differ.
A practical “budget guardrail” mindset
Instead of chasing the lowest number, aim for the best value in three areas: structure that doesn’t move, water management that protects your home, and a finish plan you’ll actually maintain. Those choices tend to reduce long-term costs and frustration.
Permits and Code Considerations in Denton, TX
Permits can feel intimidating, but they’re ultimately about safety and documentation. In Denton, whether your cedar patio cover needs a permit often depends on scope, attachment method, and electrical. The smartest approach is to treat permitting as part of the planning phase—so you don’t redesign mid-project.
When a permit may be required
Many patio covers trigger permitting when they are attached to the home, include a solid roof, or involve structural elements that need verification. Electrical additions (fans, lights, outlets) can also require permits and inspections. Requirements can change, so confirm current rules before starting.
Setbacks, easements, and property lines
Freestanding covers and larger attached structures may be limited by setbacks and easements. This is especially important if you want posts near fences or if your yard has utility easements. Planning around these constraints early prevents rework and delays.
Electrical safety and planning
Outdoor electrical must be code-compliant—weather-rated components, proper protection, and correct routing. The design should account for where switches live, how circuits are protected, and how fixtures are mounted to the cedar structure.
Footings and anchoring: the hidden safety factor
A patio cover is only as strong as the way it’s anchored. Footings, brackets, fasteners, and the method of attachment (to slab or to concrete footings) should be clearly defined before construction starts. In storm season, this is what keeps a great-looking cover from becoming a liability.
Key takeaway
In Denton, don’t treat permits as paperwork you’ll “deal with later.” They can affect the design (setbacks, attachment details, electrical routing) and timeline. A builder who can guide the process helps you avoid delays and rework.
Maintenance Tips to Keep Cedar Looking Great
Cedar ages gracefully—if you give it a simple maintenance rhythm. Denton’s pollen season, humidity spikes, and sun intensity can make surfaces look tired faster than you expect, especially on the sun-facing edges. The good news: maintenance is straightforward, and small efforts prevent big refinishing jobs.
1) Wash periodically (and gently)
Remove pollen, dust, and early mildew before it stains. A gentle wash is usually enough—harsh pressure washing can damage wood fibers and create fuzzing that makes the finish look uneven.
- When: after spring pollen season and after long humid stretches
- Focus areas: shaded corners, near planters, under drip lines, and around gutters/downspouts
2) Reapply stain/sealer on a realistic schedule
Your recoat timing depends on exposure and product choice. South- and west-facing faces typically need attention sooner. If you notice water no longer beads or the color looks washed out, it’s often time to refresh.
3) Inspect after storms
After severe weather, do a quick check: hardware tightness, any movement at connections, and any roof component issues (for solid covers). Catching small problems early can prevent bigger repairs later.
4) Keep plants trimmed for airflow
Posts that stay damp due to dense landscaping can weather faster. Trim back shrubs and climbing plants so cedar can dry after rain and morning dew.
5) Fix small issues early
Minor checking (small surface cracks), worn finish at sun-exposed edges, or clogged gutters are normal over time. Addressing them early keeps the cover attractive and helps prevent water intrusion and uneven aging.
If you want your cedar to stay “warm” instead of going gray
Choose a stain/sealer with strong UV protection, keep the surface clean, and refresh before the finish fully fails. In Denton sun, waiting until the wood looks “raw” often means more prep work later.
Conclusion: What to Expect from a Cedar Patio Cover Build in Denton
A cedar patio cover can transform how you use your backyard—turning a hot, underused slab into a comfortable space for meals, evenings with friends, and daily downtime. The best outcomes come from aligning the cover style with your real shade needs, building with solid structure and smart drainage, and planning electrical and finish details early.
- If you want maximum comfort and weather protection, a solid roof cover usually delivers the most usable shade.
- If you want filtered light and an open feel, a lattice/pergola design can be a beautiful fit.
- If you want a separate backyard destination, consider a freestanding pavilion (and confirm setbacks/easements early).
- For long-term satisfaction, prioritize post/beam design, anchoring, and water management before decorative upgrades.
- Keep cedar looking premium with a simple routine: wash, inspect, and recoat on schedule.
If you’re still narrowing the style that fits your home and layout, browsing nearby project types can help clarify what you like. You may also find helpful ideas in Double Oak custom built cedar patios and high-end cedar patio extensions in Cross Roads.
Ready to Build a Cedar Patio Cover in Denton?
Talk with JBN Patio Covers about design options, shade goals, and a clear plan for your project. Call 469-340-0839 or use the contact form to get started.